Setup Sign-Off Captions
The 'Setup Sign-Off Captions' dialog is used to design the look/feel of sign-offs that can be automatically drawn into event documents, as set up in PrintBuilder.
 Profile Manager - Setup Sign-Off Captions
Adding Sign-Off Sections to PrintBuilder Reports
To add an event or document sign-off section to a PrintBuilder event report, edit the report in the designer, then from the menu options select 'Sign-Offs...Add Event Sign-Off Region' or 'Sign Offs...Add Document Sign-Off Region':
PrintBuilder - Sign-Off Options
This new region can be added to Title Band or Summary Band (typically, Summary Band is the best choice). Upon selection, this region is auto-created. If the related band is not yet visible, it will be made visible. The new region, by default, will take the entire width of the band. The only exception would be if you placed another sign-off region in the same band. In this case, the width and left position from the previously created region will be repeated - so the regions will look consistent. Note **:**here are additional options under 'Options (Upon Create),' allowing you to omit 'Title Band' or 'Border' if desired.
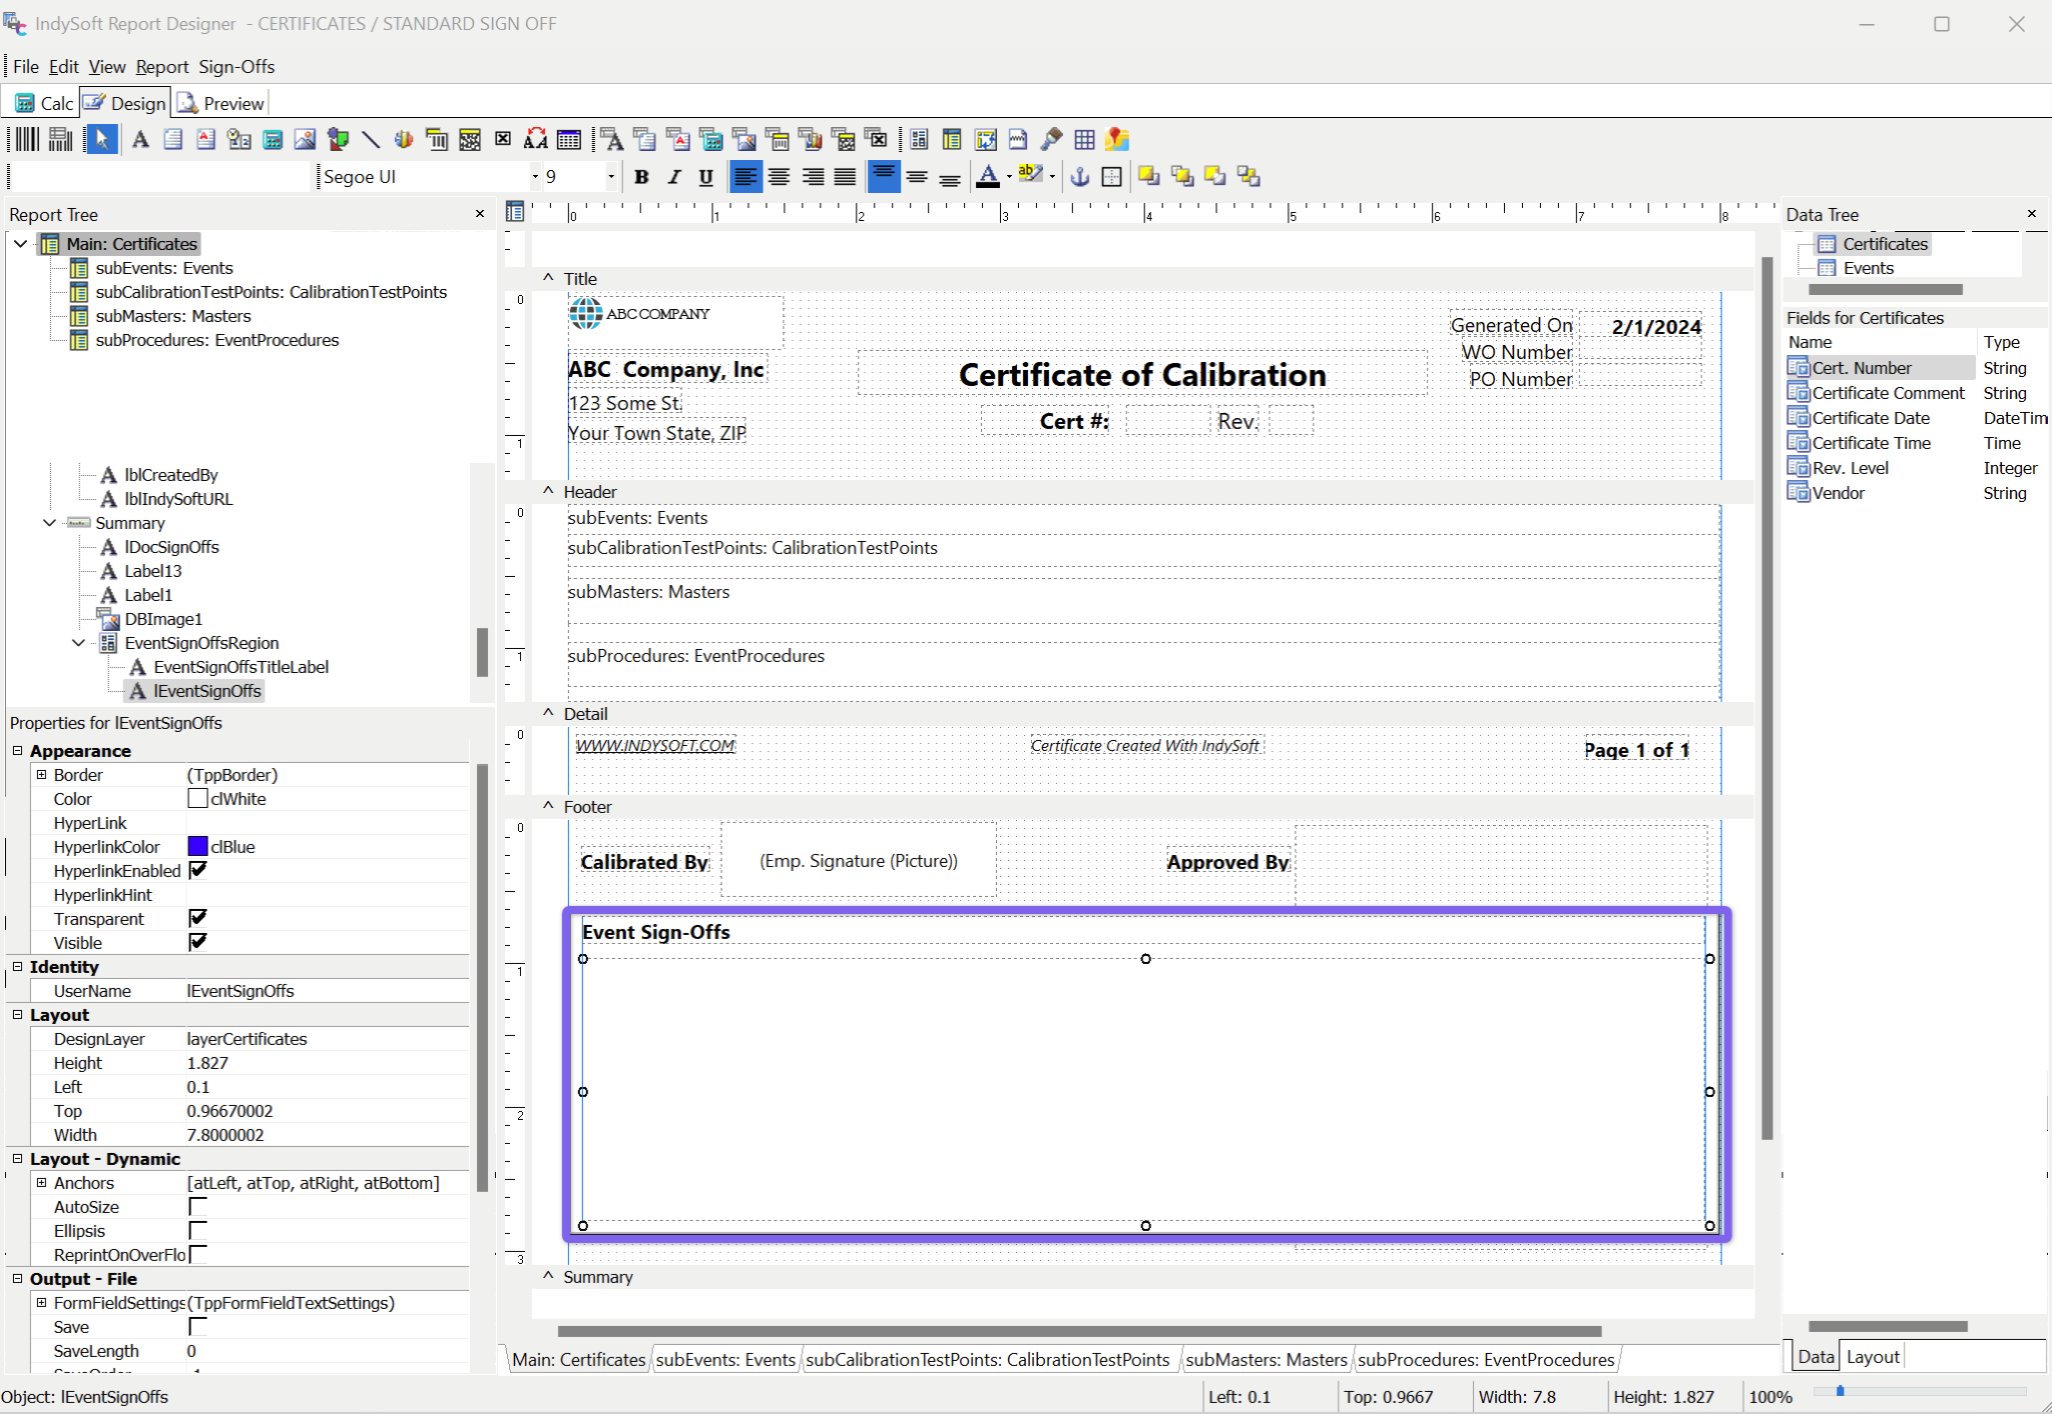
Event Sign-Off Region in Summary Band
After the region is added, feel free to resize/reposition as desired. Keep in mind that the height of the region is important. All the document/event sign-offs will be drawn in this space. The vertical space will be divided by the number of sign-offs, each taking up equal space. (A maximum space can be set in the 'Setup Sign-Off Captions' option in Profile Manager - so all the vertical space might not be used in this instance) So, if you expect 2-3 sign-offs, leave appropriate space. The signature image will be automatically resized to fit into the appropriate space. If a line and sign-off caption is set up for display, these items will have a fixed font size. Here is an example of the final output:
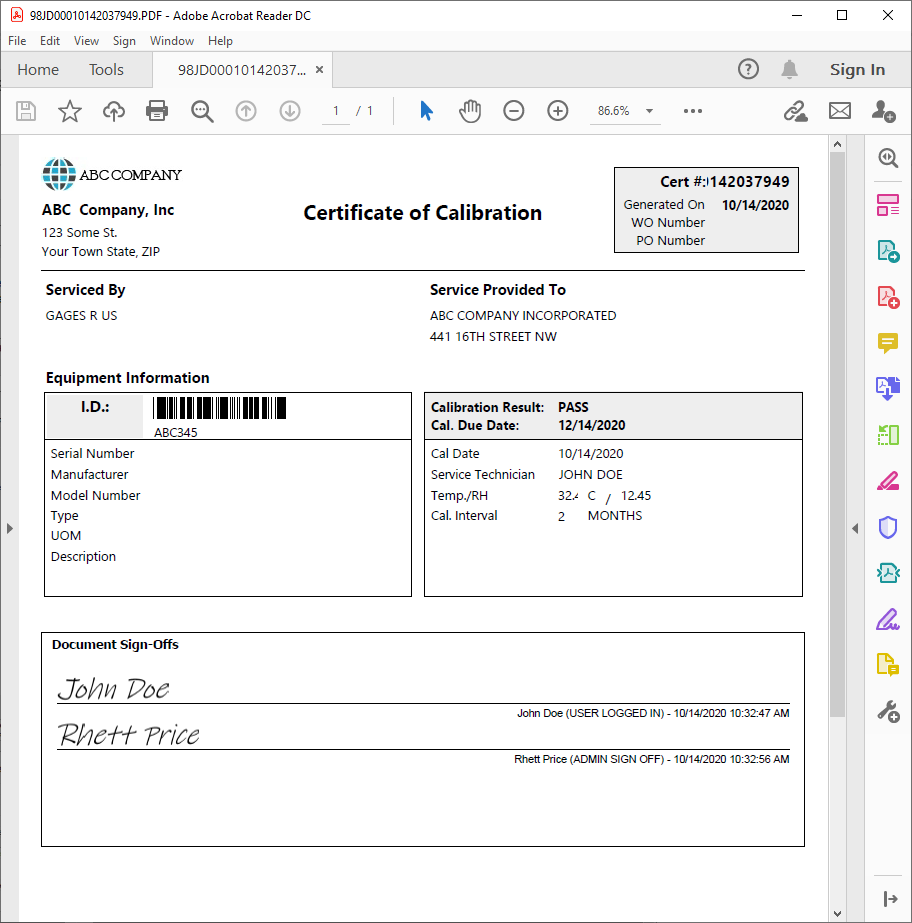
Cert Example with Sign Off - Final Output
Setup Sign-Off Captions - Options
This dialog allows for the system-wide setting of options for all sign-off drawings in PrintBuilder documents:
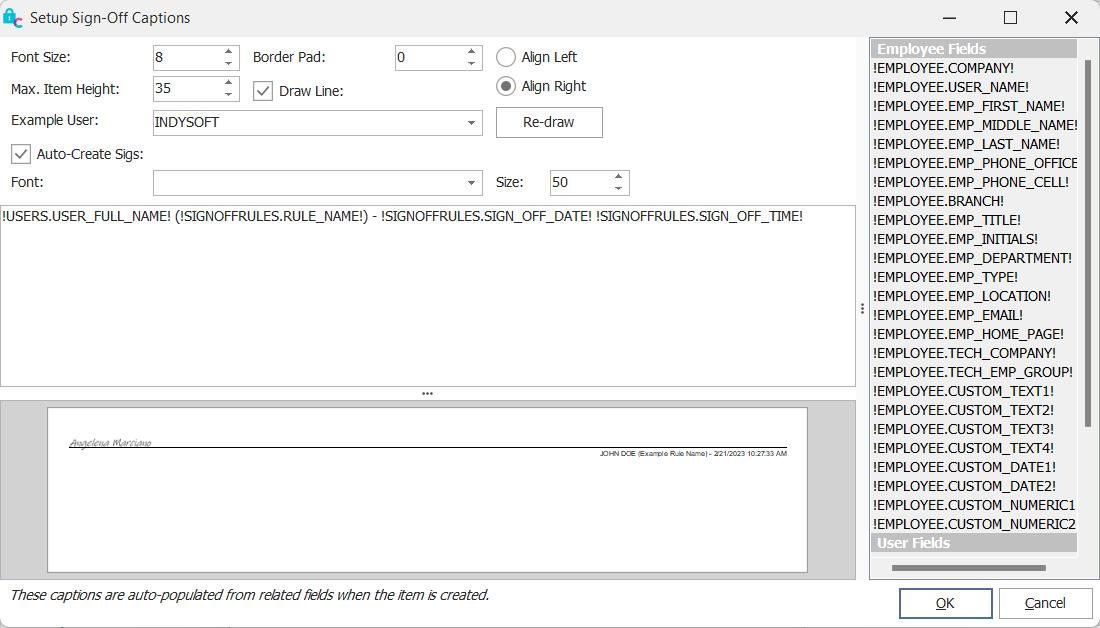
Setup Sign-Off Captions Dialog
Font Size: the font size of the caption drawn beneath the optional line. The actual text is defined in the mail-merge section.
Border Pad: set a pad here if you want some white space surrounding the sign-off section.
Max. Item Height: typically, the sign-offs are equally divided between the available space in the sign-off region. But this max item height can be used to ensure that each item never exceeds this height. So if you typically only have two sign-offs, but occasionally four, then you can allow for a sign-off region that could show four sign-offs, but if only 2, these two sign-offs will not be drawn unusually tall.
Draw Line: draw a horizontal option line underneath the signature image and above the sign-off caption.
Align Left/Right: align the sign-off caption to the left or right of the signature region.
Example User: the user name used in the display example on this dialog.
Auto-Create Sigs: the employee signature is typically taken from the related employee's Add/Edit Employee wizard, where the signature is drawn/created and saved to the database. But if this option is on, if there is not a signature found in the database for this employee, then one will be auto-crated based on the font/size listed below.
Font / Size: the font used to draw Auto-Create Sigs. 'Ink Free' often works well and is automatically distributed on Windows workstations.
Finally, create the signature caption text by using the mail-merge options on the right - just as is done for email layout merge text. The available fields are related to the employee record, related user name, and related sign-off rule.