Profile Manager - Adding/Removing Users
Adding Users
Press the ![]() Add User button to get the following screen:
Add User button to get the following screen:
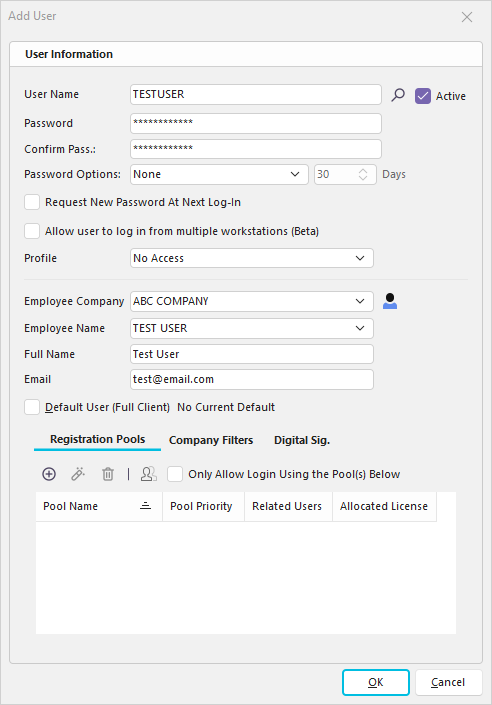
Add User Dialog
User Name - The name of the user. This will be the logon name used in IndySoft. You can also set User/Location Settings by pressing the ![]() User/Location Settings button.
User/Location Settings button.
Password - The password associated with the User Name listed above.
Confirm Password - You must enter the password correctly (identical to the Password text above) before a new User Name is added.
Password Options - Specify how frequently the user must change the password, if at all.
Request New Password At Next Login - If this box is checked, the user will have to change to a new password the next time the user logs in
Allow Users to log in from multiple workstations (Beta)
Profile - The default profile for the user. This can be customized further later.
Employee Company / I.D. - This is used to identify the unique employee using this login. For instance, if you were logged in as 'JDOE' in the example above and performed a calibration event, then 'JOHN DOE' would appear in the 'Performed By' field in the calibration event. You can press the ![]() Add/Edit Employee button to add an employee as you set up the employee as a user. See Employees vs. Users for more details.
Add/Edit Employee button to add an employee as you set up the employee as a user. See Employees vs. Users for more details.
Full Name - This field can specify a full name for the user. This full name will show up on reports, etc. when required.
Email - Email address associated with this user/employee
Active - Whether this user is active. This determines if the user is allowed access to IndySoft. Note : If a user exceeds the specified # of incorrect login attempts, they will automatically be set to inactive. A System Administrator must then reset the user to Active through Profile Manager.
Default User - By setting up a user with a standard set of preferences and checking this box, you can save a lot of effort as you create new users. Be sure to set the User/Location Settings, as well.
Registration Pools - See License Pools topic for more details. Use this grid to set up any license pools that should be preferred for this user upon login. For each pool, input a priority - lower #'s designate a higher priority. Important: check the 'Only Allow Login Using the Pool(s) Below' checkbox if this username should only be allowed access through one of their specified pools.
Company Filters - This setting is used to specify a default company filter that should be used when this System Administrator creates new users in Profile Manager. This setting can only be set by another System Administrator that does not have a Company Filter setup for their user name.
When all the information has been entered, press 'OK.'
Digital Sig. - This setting allows a digital signature to be applied to the IndySoft user via a .PFX certificate file. To utilize this feature correctly, trusted/verified certificates should already be obtained and tied to the applicable user's P.C. - before the setup in Profile Manager. The primary purpose of this setup would be to enable documents with this particular type of e-signature attached (essentially the user's electronic fingerprint) that records the sign-off transaction and shows additional information on the PDF, such as if the signer's identity is valid, if the document has been edited since the sign off was applied, etc.
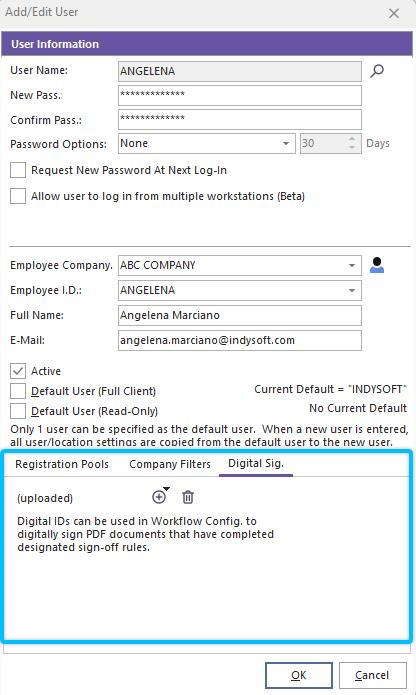
Add/Edit New User - Digital Sig.
To add a new digital signature via .PFX file, click the plus button and select "Import Digital ID (from Existing PFX File)":
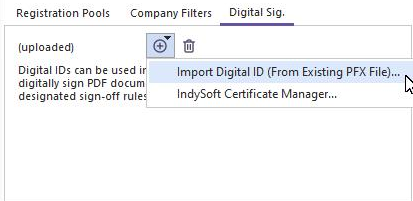
Import Digital ID (from PFX)
Note : Google Chrome PDF Viewer cannot currently view digital signatures. You must launch the PDF document in Adobe to view the digital signature successfully.
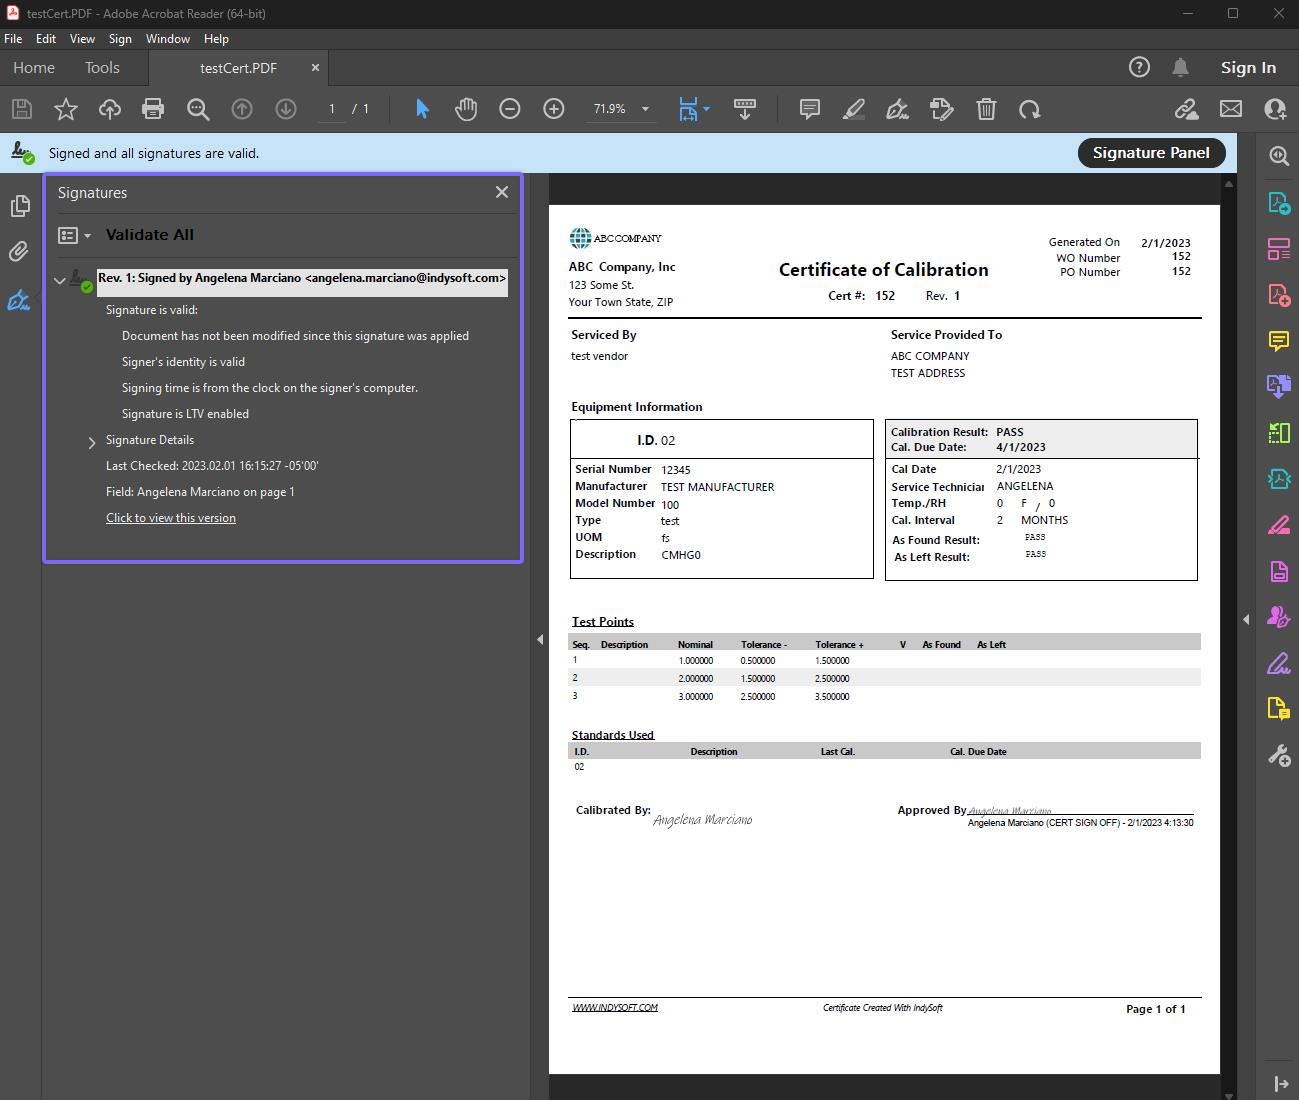
Example - Adobe Acrobat Validated E-Signatures
![]() *Version 13.0.12 ||*Keycloak 2.0 (cloud customers) – added security checks on the email field under both user/employee records to ensure that each is unique – if email exists, the user is prompted so
*Version 13.0.12 ||*Keycloak 2.0 (cloud customers) – added security checks on the email field under both user/employee records to ensure that each is unique – if email exists, the user is prompted so
Removing Users
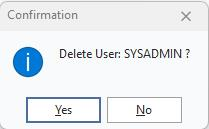
Press the ![]() Remove User button to delete the highlighted user. The following confirmation prompt will appear:
Remove User button to delete the highlighted user. The following confirmation prompt will appear:
Remove User Confirmation |