Equipment Search By/Report Dialogs
reports-tab.mdreports-tab.mdreports-tab.md
![]() | Note: In Version 14, these equipment search/reports are now accessible from the new Reports TabEquipment search by/report dialogs can be launched from either the main screen header...Search By/Report menu or from hyperlinks created on the Home View:
| Note: In Version 14, these equipment search/reports are now accessible from the new Reports TabEquipment search by/report dialogs can be launched from either the main screen header...Search By/Report menu or from hyperlinks created on the Home View:
Equipment Search By/Report Dialogs Launched from Header
These Equipment search by's/reports available in the header depend on visibility rules set up for Equipment searches/reports created in PrintBuilder...General Reports...Equipment. These dialogs can be used to quickly locate assets on the Equipment View or launch reports sent to printer/email, etc. - or they can be used for both purposes. The functionality on these search dialogs greatly depends upon the setup of the search/report in PrintBuilder. So keep in mind that some of the functionality sections described below might be hidden in certain simpler searches created in PrintBuilder.
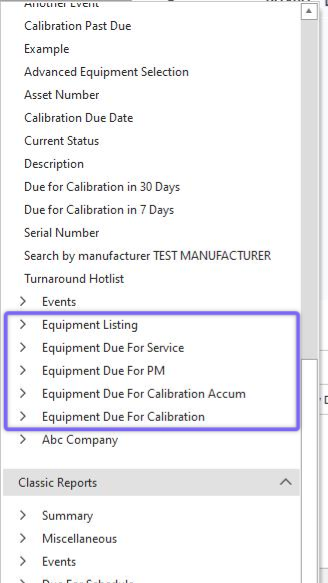
Equipment search by's/reports can also be launched from hyperlinks created on the Home View as:
EQUIPMENTLISTING=[ReportName]
Where [ReportName] is replaced with the name of the search/report to be launched (its name in PrintBuilder):
Also, Equipment search/report dialogs are launched from flowcharts embedded into a Home View - when a user clicks on a tracking status block. This functionality is set up per flowchart in the Flowchart Editor.
Equipment search/report dialogs look very similar to Custom Search By's and General Search By/Report Dialogs - this is by design; once you understand one interface, you generally understand them all. There are several general sections:
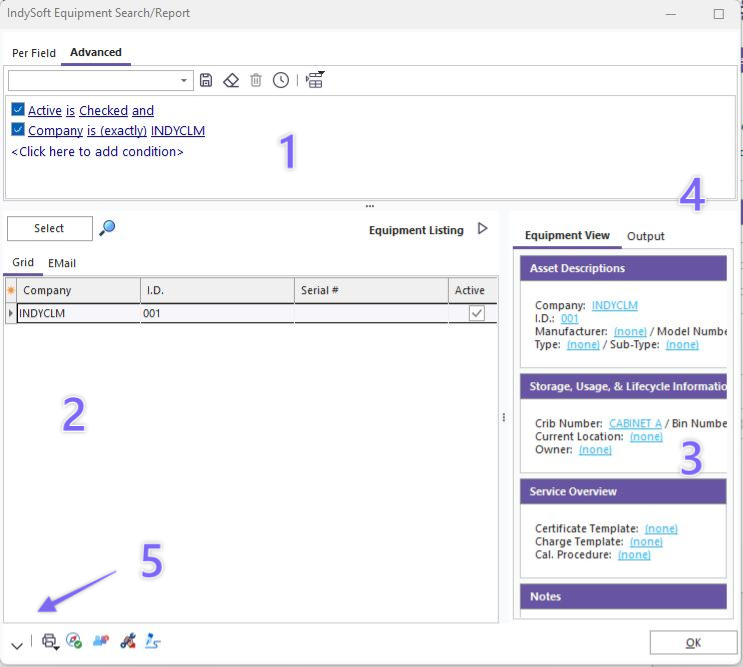
Equipment Search/Report Dialog - General Sections
1. Equipment Filter
2. Equipment Results (grid)
3. Equipment View
4. Output (report)
5. Event Launch
See the matching sections below for more details.
- Equipment Filter
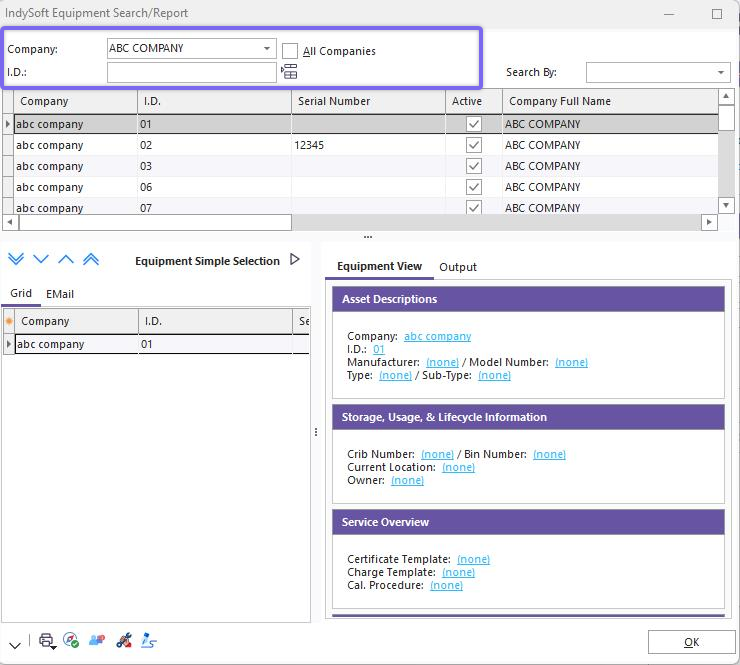
Use this top section of the dialog to fine-tune the search to return the desired equipment. Depending upon the setup of the equipment search/report, three different styles of filtering might be shown (and more than one can be visible - if so, you will see each on a sub-tab):
Advanced Filterbox
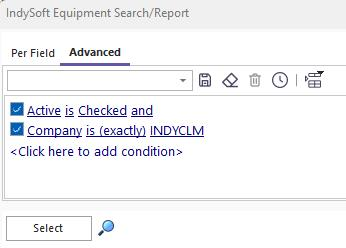
Advanced Filterbox Tab
Use this filter just like other filterboxes in IndySoft to adjust the search criteria.
Note: this filter might be read-only, depending upon the setup of the search/report in PrintBuilder. If editable, this filter can be used to search on equipment-level fields and related schedule and company details. Use the drop-down above the filter to recall previously saved searches - these saved searches can be user-based or global.
Per Field

Per Field Tab
The Per Field tab allows for searching based on Company, ID, and up to 8 customizable fields. Each field can be set up with a related drop-down (if appropriate). Search values can be input for one or more fields simultaneously - only matching records will be shown in the selected equipment.
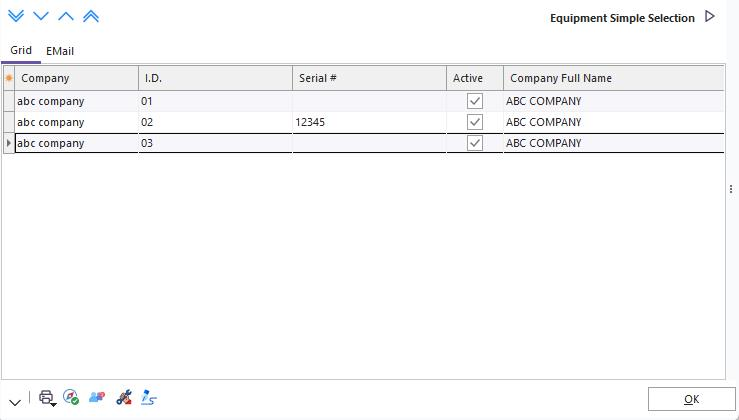
Simple Selection
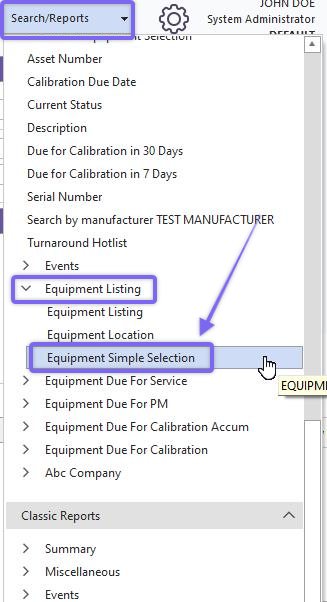
Locating 'Equipment Simple Selection' from Header
Simple Selection Dialog
This Simple Selection tab is much like the EquipmentFinder - Simple Equipment Selection familiar from versions prior to 9x. This interface allows for quickly selecting one asset at a time into the grid at the bottom of the dialog. The 'top' grid (the one right beneath the ID edit) shows a listing of assets from a particular company (or all companies if the 'All Companies' checkbox is ON) - simply double-click on an asset in the grid to add it to the listing of selected equipment.
- Equipment Results (grid)
This grid shows the results of the search - only the fields selected in the search/report design in PrintBuilder are returned:
Equipment Results
Press the' Select' button to return records to the grid (or refresh the results). Pressing the 'Test Selection' button to the right will return a count of matching assets - this will occur much more quickly than the actual search and can be used to confirm your search is set correctly. Several options are available in the grid with a right-mouse click:
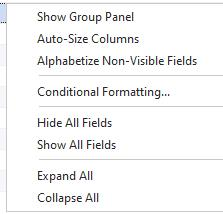
Equipment Results - Right-Mouse Click Options
Show Group Panel
Turns on a group panel above the grid - use this panel to drag/drop fields that will be grouped in an outline structure. Multiple fields can be grouped at once if desired.
Customize Fields
Displays a small window showing additional fields that can be added to the grid. To add a field to the grid, drag it from this window into the grid's header section. To remove a field, drag a field from the grid header into the fields window. Important: press 'Select' again to ensure the new fields have values in the result set. Select the # of visible fields carefully. The smaller the # of fields, the quicker the search/report can be completed.
Hint: to select the visible fields more quickly, press the small ![]() button in the upper-left of the grid - this will cause a drop-down to display listing all available fields - check the desired fields. You can also drag/drop fields to various relative positions in this list to modify the field positions in the results grid.
button in the upper-left of the grid - this will cause a drop-down to display listing all available fields - check the desired fields. You can also drag/drop fields to various relative positions in this list to modify the field positions in the results grid.
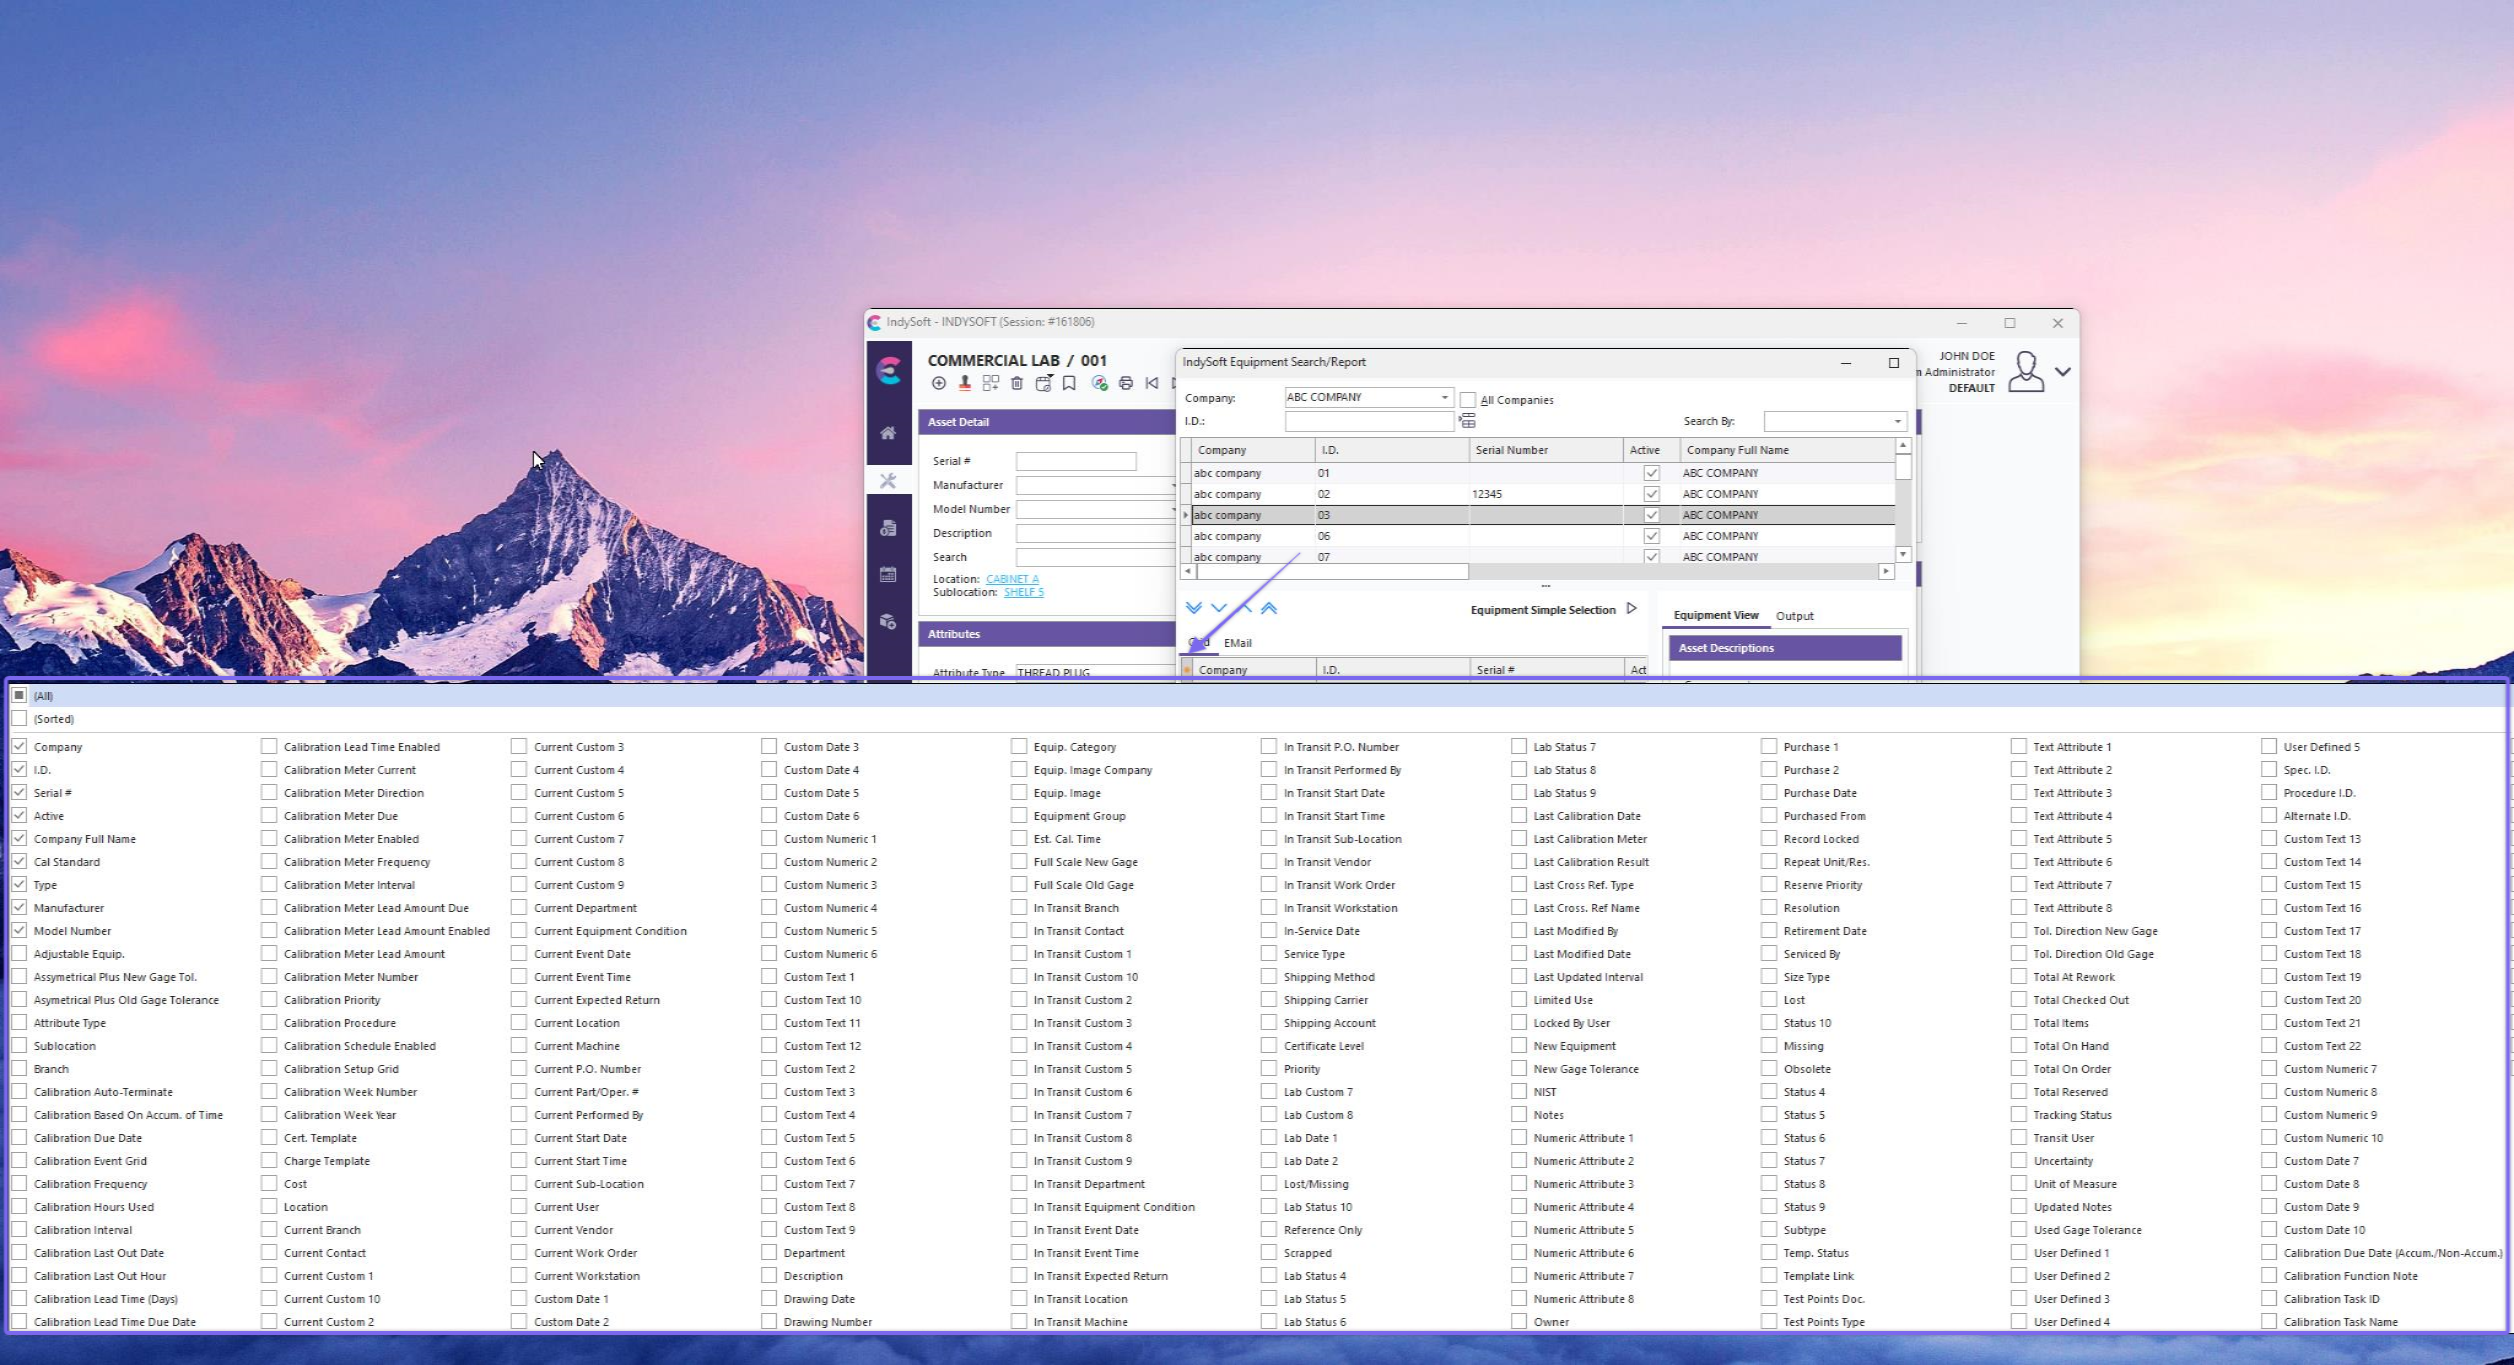
Quick Field Customization
Alphabetize Non-Visible Fields
This option can save time when using the quick customization panel (screenshot above). Use this option to automatically sort all the non-visible (unchecked) fields alphabetically. After this operation, the fields can still be resorted manually as needed - just a one-time resort for convenience. When this operation is performed, all visible (checked) fields will be grouped first, above all non-visible fields.
Auto-Size Columns
This option can save time when sizing fields to show as much information as possible horizontally in the grid. This option will automatically resize all fields to the smallest size possible, which ensures that all data in the field (including the header name) can be displayed. Note: this operation might take several seconds, depending upon the size of the # of records in the grid.
Hide All Fields
Use this option to hide all fields in the grid quickly, then add back only the fields you need. This is helpful if you want to quickly go from a large # of fields to a small # of fields.
Show All Fields
Use this option to quickly show all fields in the grid - then remove the fields you do not need. This is helpful if you want to quickly go from a small # of fields to a large # of fields.
Note: depending upon the Equipment search/report setup, you might see Schedule or Bin details embedded into each record in the grid (if schedules or bins exist for that record).
- Equipment View
This section shows an Equipment View preview of the selected item in the grid to the left. The layout used for the Equipment View is set up with the search/report in PrintBuilder. This layout is helpful for reviewing/confirming field information before selecting the asset on the main screen's Equipment View. The Equipment View layout is read-only (no hyperlinks).
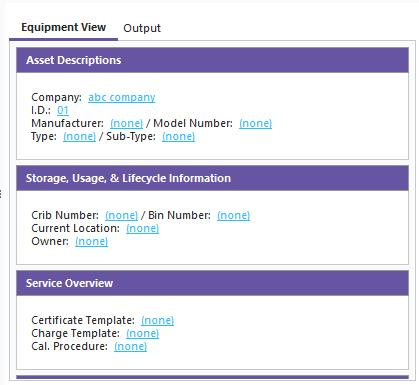
Equipment View in Equipment Search
- Output (report)
This section allows for the quick export of the equipment records as a report. Depending upon the options set to be visible in the setup of the search/report in PrintBuilder, this output might be as a grid or in a custom format, as designed in the IndySoft Report Designer.
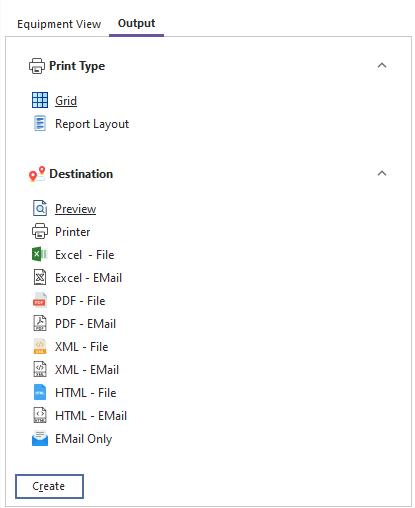
Report Output Tab
There are two groups: Print Type and Destination. Select the desired choice from each group (one selection from each group) and press 'Create' to generate the report in the desired fashion. Note that some Print Type or Destination options shown above might be hidden for specific search/reports, depending upon the setup in PrintBuilder.
- Event Launch
Some Equipment search/reports might display 1-3 buttons in the lower-left of the dialog allowing for quick launch of events. Events will execute upon all selected records in the grid (unless the 'Use All Equipment Upon Event Launch' option is enabled in the setup of the search/report in PrintBuilder).

Event Launch from Equipment Search/Reports
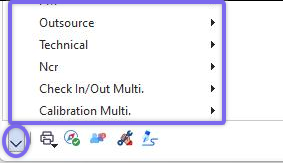
Event Launch Options
Use the small black arrow to the right of any event buttons (if relevant) to launch into ANY event - only events visible for your login scenario will be displayed (same grouping of events as visible from the 'Events' menu in the main screen header). |