EquipmentFinder - Common Features
EquipmentFinder Screen
Sections of the Screen
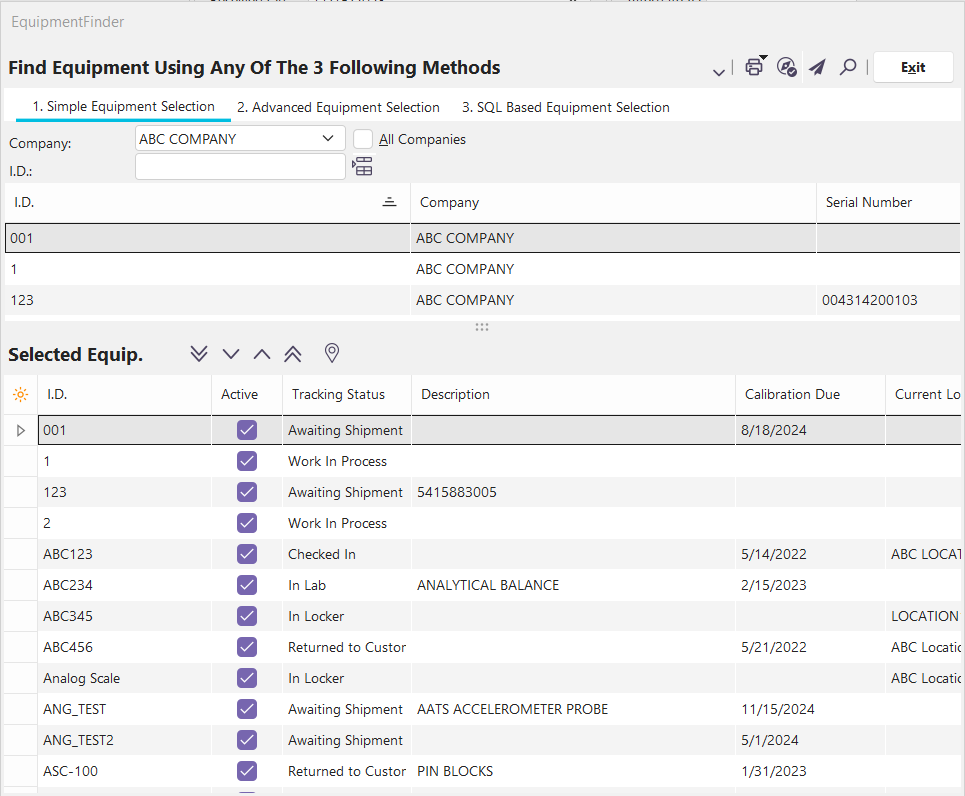
The equipment finder has three major sections. There is a button bar at the top of the screen, which is used to launch activities such as performing events. There is the Selection area in the top half of the screen, and there is the list of Selected Equipment at the bottom of the screen.
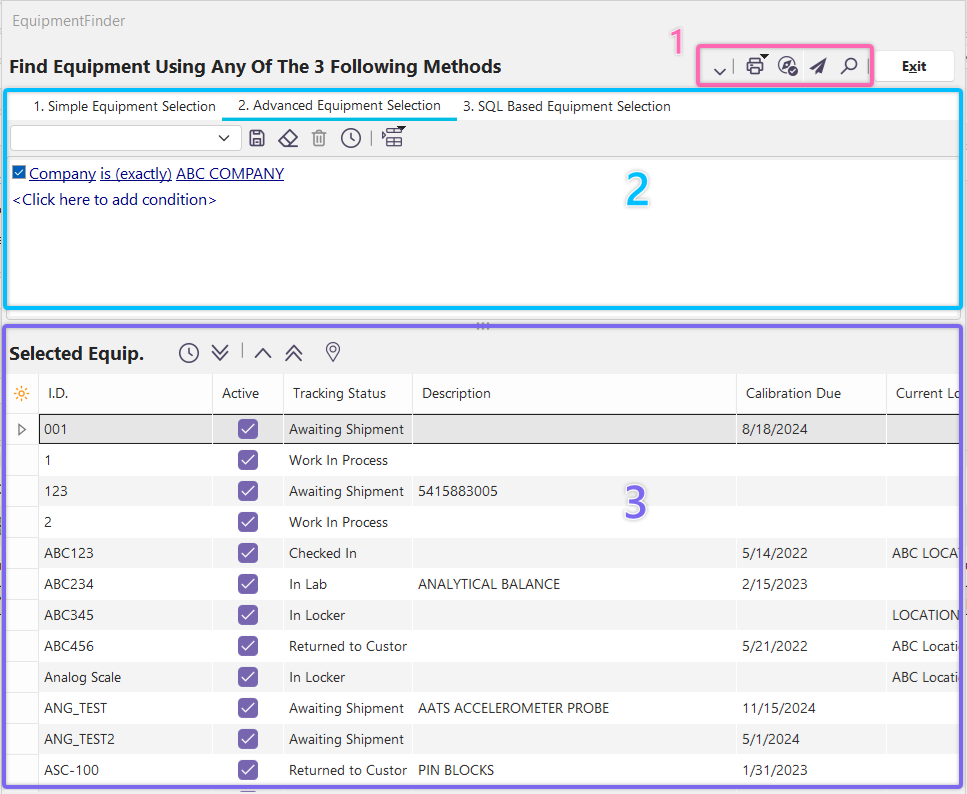
There are three tabs for choosing the type of selection you wish to perform: Simple Equipment Selection, Advanced Equipment Selection, and SQL Based Equipment Selection, each described in more detail on its page. The buttons for the Selected Equipment change slightly depending on which Selection method is used, so they are described with each Selection method.
Selected Equipment
The grid in the Selected Equipment section contains all of the equipment that has been selected so far. Whichever equipment remains in this grid when the dialog is exited (or the Equipment list is sent to the Equipment Navigator, etc.) will be the equipment that is finally selected. In addition to using the buttons described below, the equipment can be transferred into the grid or selected by dragging and dropping from the grid located on Tab 1 - 'Simple Equipment Selection' into the Selected Equipment grid. If you double-click equipment within the Selected Equipment grid, the EquipmentFinder will close, and the equipment will be looked up on the IndySoft main screen. Finally, as you change between Selection tabs, the Selected Equipment will not change, so you can get a few hard-to-locate items using an Advanced Selection and then use a Simple Selection to find additional items that are easy to locate.
Button Bar
Once you have selected equipment, you can perform several other functions using the buttons at the top of the dialog.
![]() Commit/Launch New Event Arrow
Commit/Launch New Event Arrow
If you want to launch an event immediately based on the currently selected equipment, then you can press the 'Launch New Event Arrow' and select the new event type from a popup menu. The available event types are the same as those displayed in the 'Events' menu on the IndySoft main screen.
![]() Print Options
Print Options
Clicking this button will produce a menu giving five different print options for printing equipment lists. See the printing-related sections later in this topic for more details.
![]() Send Selected Items to Navigator
Send Selected Items to Navigator
This button will send the equipment listed in the selected items section to your navigator.
![]() Send Selected Items to Another User
Send Selected Items to Another User
This button will send the equipment listed in the selected items section to another user.
![]() Go to Selected Equipment
Go to Selected Equipment
This button will close the screen and find the currently highlighted item in EquipmentFinder's selected item section.
Print Certificates
Clicking this menu item produces a submenu with the option to print certificates of calibration for the most recent event with the following two options:
All Equip.
Certs will be printed for all equipment in the selected items list
Highlighted Equip.
Certs will only be printed for the highlighted equipment in the selected items list
Either one will bring up the following dialog:
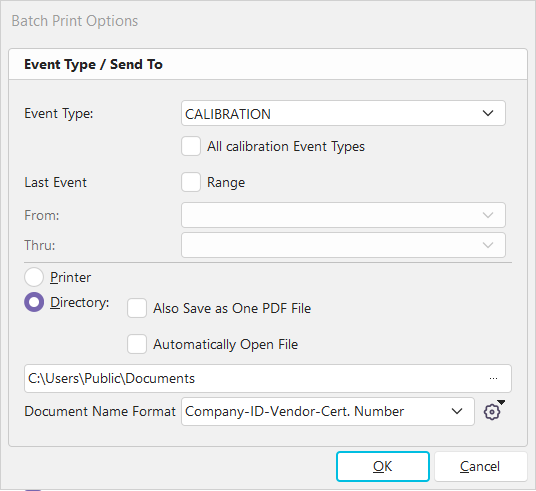
Print Options Dialog
Event Type
This option will allow users to choose between printing a specific event type or an alternative for 'All Calibration Event Types.'. See the Event Configuration section for specifying which events are considered Calibration events. A good example is standard Calibration and Multi-Gage Calibration events. These events are both considered calibrations; however, they are still two distinct event types. The 'All Calibration Event Types' feature is intended to allow for this condition.
Event Range
This option will allow users to choose a specific date range for which to print the certificates for. For example, if you set the event date range to be 'From 1/1/2023 Thru 1/31/2023' then all certificates matching the event date filter of the month of January 2023 will be printed.
Printer or Directory
This feature is for choosing the option of sending the certificates to a printer or a directory. The directory option will typically be used if a user wants electronic copies of the certificates. If the 'Automatically Open Files' option is chosen, the certificates will be opened after being saved to the directory. In the case of PDF certificates, they will all be combined into one PDF before being opened; however, they will be saved to the specified directory individually. This is so you can quickly preview what was saved with 1 Acrobat Window and maintain separate certificates to send to the end user. If you want to send the combined PDF to your end user, use Adobe Acrobat to save the file (or use the Acrobat 'Send to e-mail' option).
Document Name Format
This feature allows the user to set specific document name formats for use when batch printing certificates. There is a new add/edit list under Systemwide...Document Formats where users can create multiple different document name formats using merge items.
Print Event Documents
Clicking this menu item produces a submenu with the option to print event documents for the most recent event with the following two options:
All Equip.
Certs will be printed for all equipment in the selected items list
Highlighted Equip.
Certs will only be printed for the highlighted equipment in the selected items list
Either one will bring up the following dialog.
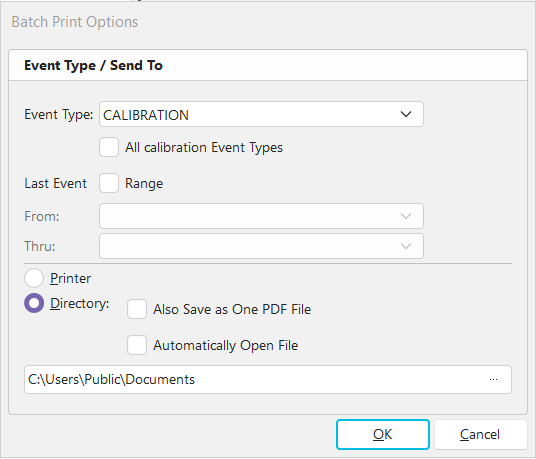
Print Options Dialog
Event Type
This option will allow users to choose between printing a specific event type or an alternative for 'All Calibration Event Types.'. See the Event Configuration section for specifying which events are considered Calibration events. A good example is standard Calibration and Multi-Gage Calibration events. Both of these events are considered calibrations; however, they are still two separate event types. The 'All Calibration Event Types' feature is intended to allow for this condition.
Event Range
This option will allow users to choose a specific date range for which to print the certificates for. For example, if you set the event date range to be 'From 1/1/2023 Thru 1/31/2023' then all certificates matching the event date filter of the month of January 2023 will be printed.
Printer or Directory
This feature is for choosing the option of sending the certificates to a printer or a directory. The directory option will typically be used if a user wants electronic copies of the certificates. If the 'Automatically Open Files' option is chosen, the certificates will be opened after being saved to the directory. In the case of PDF certificates, they will all be combined into one PDF before being opened; however, they will be saved to the specified directory individually. This is so you can quickly preview what was saved with 1 Acrobat Window and maintain separate certificates to send to the end user. If you want to send the combined PDF to your end user, use Adobe Acrobat to save the file (or use the Acrobat 'Send to e-mail' option).
Print P-Touch Stickers
Clicking this menu item produces a submenu with the option to print stickers on a P-Touch printer for the most recent event with the following two options:
All Equip.
Stickers will be printed for all equipment in the selected items list
Highlighted Equip.
Stickers will only be printed for the highlighted item in the selected items list
Either one will bring up the following dialog.
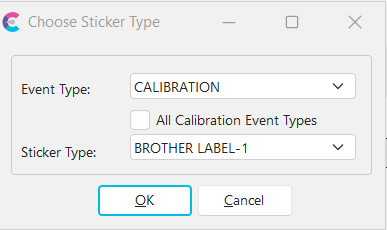
Choose Sticker Type Dialog
Event Type
This option will allow users to choose between printing a specific event type or an alternative for 'All Calibration Event Types.'. See the Event Configuration section for specifying which events are considered Calibration events. A good example is standard Calibration and Multi-Gage Calibration events. Both of these events are considered calibrations; however, they are still two separate event types. The 'All Calibration Event Types' feature is intended to allow for this condition.
Sticker Type
This feature is for choosing the type of P-Touch sticker template you wish to use when printing stickers.
Print Worksheets
Clicking this menu item produces a submenu with the option to print worksheets with the following two options:
All Equip.
Worksheets will be printed for all equipment in the selected items list
Highlighted Equip.
Worksheets will only be printed for the highlighted equipment in the selected items list
Either one will bring up the following dialog.
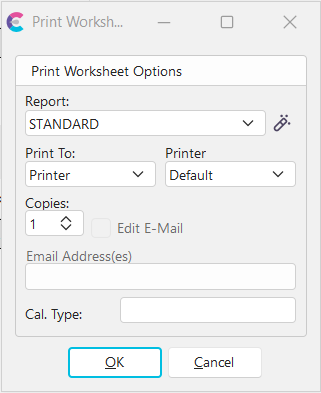
Print Worksheets Dialog
Report
This option allows you to select what report you wish to print. Press the 'Edit Template' button to edit the report.
Print To
Choose from E-mail, Printer, or Screen.
Printer
Choose from Default or Printer 1-5, if Printing to Printer.
Email Address(es)
Type the email address, if Printing to E-mail.
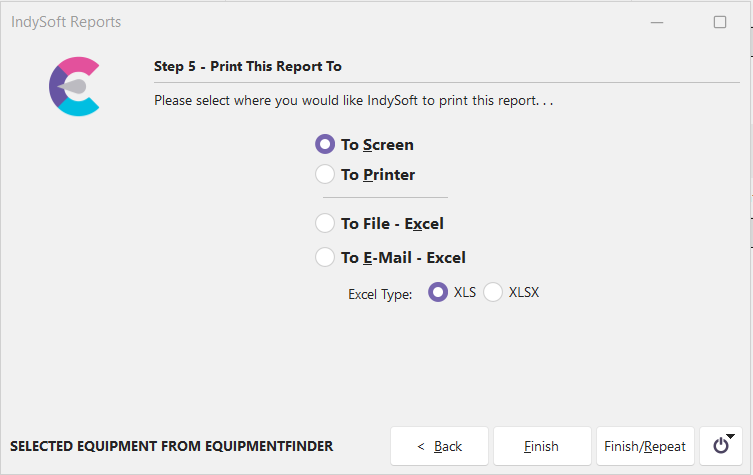
Print List of Selected Equipment
Clicking this menu item will launch the 'Equipment Summary - Selected Equipment From EquipmentFinder' report. See Report Types for more information.
 |
|